

The bright, unpleasant light of a direct flash might ruin an otherwise great photo. And setting up an off-camera flash can be time-consuming and costly. However, with bounce flash, you may mimic the off-camera look without having to move the flash itself.
Bounce flash is a technique that uses an object to reflect the camera's flash back onto the subject. The result is ambient light with depth and texture that mimics the effect of using an off-camera flash.
No terrible, hard shadows like you get from direct flash, either.
To get the most out of your flash, especially when you're just starting out, you should learn the fundamentals of bounce flash first.
Whether you're a beginning wedding photographer taking photos at receptions or a portrait photographer just starting out, here are some techniques for using bounce flash effectively.Looking for the best Wedding Photographer in Melbourne? Check out our ultimate list here.
Is There a Limit to the Power of Flash You Can Use with the Bounce Method?
Bounce photography is inapplicable to digital cameras because of their built-in pop-up flashes.
Bounce flashes consist of a flash with a movable head that slides into the camera's hot shoe. The light from most hot shoe flashes may be directed where you need it thanks to the flash's pivoting head. Some people will have more flexibility than others. Remember to include a foldable chair in case of emergency.
Find a Big, Plain Surface in a Neutral Color
The light from a bounce flash must have an object to bounce off of. As a rule, the surface conditions necessary for this sort of activity are available. A wall or roof can serve as an excellent rebounding surface. There is a finished product and no need for any additional materials. The secret to a gentle, welcoming warmth is a huge personality.
Photography with a flash can be quite harsh because the flash head is so tiny. In an instant, the light's reach can be increased by directing it upwards towards a ceiling or wall. This produces lighting that is softer and more aesthetically pleasing.
Simply adjust the position of the flash head to illuminate the desired area.
A flash can be made to appear to come from another direction by reflecting it off of an item. There's no way you can move that wall by yourself. It is often possible to position the subject such that they are illuminated from a more pleasing angle by just shifting their position.
When shooting a photograph, one technique is to bounce light off the subject at a 45- or 90-degree angle from the side.
A good bounce surface, however, requires more than just a large area. The topic will be tinged with the colour of the bouncing surface. The flash will seem pink if it is reflected off of a red surface.
Choose a neutral colour for the wall or ceiling, such white or beige, unless you're going for a tinge of colour.
Try Different Distances to See Which One Gives You the Best Flash
Even though bounce flash is ideal for producing beautiful soft light, it will significantly reduce the emotional effect of your momentous occasion.
If the final photograph is too dark after bouncing the light, either the flash or the subject needs to be moved closer to the surface being bounced off of.
The closer the light or subject is, the less energy will be lost in the bounce of the flash.
It's Worth A Shot To Switch To Manual Mode
Is there any other way to learn bounce flash? Use a flash that you can adjust manually. If you turn on TTL, your camera will automatically focus at the distance that will give you the best results. Your camera's settings are all that need to be changed, and the flash doesn't even play a role.
Distance measurements will be inaccurate if the source of light is pointed elsewhere. The brightness can be customised to your preferences while using manual instant.
The metre on the flash isn't as accurate as the one on the camera. However, you may take a trial shot and adjust the flash to your taste with digital photography because of the quick preview.
If the flash intensity is 1/1, then the next level down is 1/2, and so on.
In most cases, bounce flash calls for more adaptable camera settings than either off-camera or on-camera manual flash photography. You can always start with 1/4 if you don't know where else to begin.
Do you find manual flash to be too intimidating to even consider? When using flash correction, turning off the flash will make things simpler. The flash's power can be adjusted in the same way that exposure compensation is used to brighten or darker an image.
Use Reflectors
The floor may not be optimal for bouncing in some circumstances. Maybe the tall ceilings and vivid paint job on the walls, or the fact that you're outside, are too much to take in at once.
But this doesn't rule out bounce flash altogether!
Put your flash's light into a big reflector and see if it helps. Photographers can use reflectors to either refocus ambient light or to reflect artificial light back into their compositions.
An advantage of using a reflector over reflecting the flash off a wall is that you can focus the light exactly where you need it.
An additional person or stand is needed to hold a reflector steady when using a flash. As a result, mounting it to a ceiling or wall is often the most practical option.
If you Need diffuse lighting in any setting, a Bounce Card is your best bet.
With the bounce flash method, any glossy surface will do in place of a reflector. Using a flash bounce card, you can redirect some of the light from your flash back into the camera.
Instant cameras typically have the bounce card attached to the back, with the flash pointed upward, to avoid catching the subject's eye. Some seconds have a bounce card already built in. That's the coloured cap that slides off the top of your flash.
To produce softer light or finer illumination, a more potent set of bouncing flash accessories is required.
The flash could be bounced off a wall to create directional lighting, but the bounce card is too close to the action to be effective. In contrast to the harsh direct flash appearance, this technique results in a much softer, natural light.
There is no need for a big reflector or concern over obstructing other people's line of sight when using bounce cards.
Control the Shutter Speed and Bounce Flash for the Best Results
The amount of natural light captured in a flash photograph is controlled by the camera's shutter speed. If the shutter speed is made too fast, all background light will be blocked. The only lighting source will be the flash, and the room will be absolutely dark.
Unfortunately, there are times when you can't use any other light source besides your flash. Blending natural and flash light can generate a notable change in the final image's colour temperature.
Maybe the light is really bad and you want to use the flash the whole time. To solve this problem, changing the shutter speed is the only option.
Raise the shutter speed (but not beyond the flash sync speed, usually 1/200 or 1/250) if ambient light enters the frame too brightly.
If there isn't enough light, slow the shutter speed.
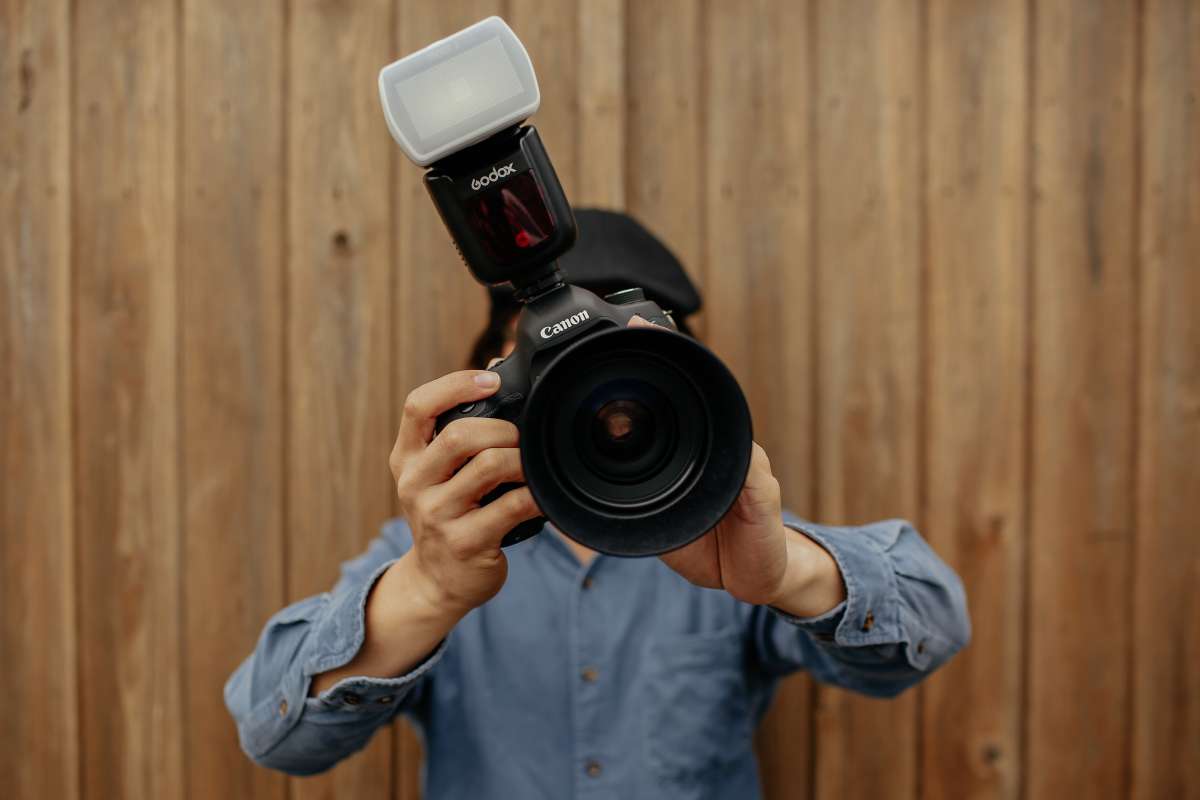
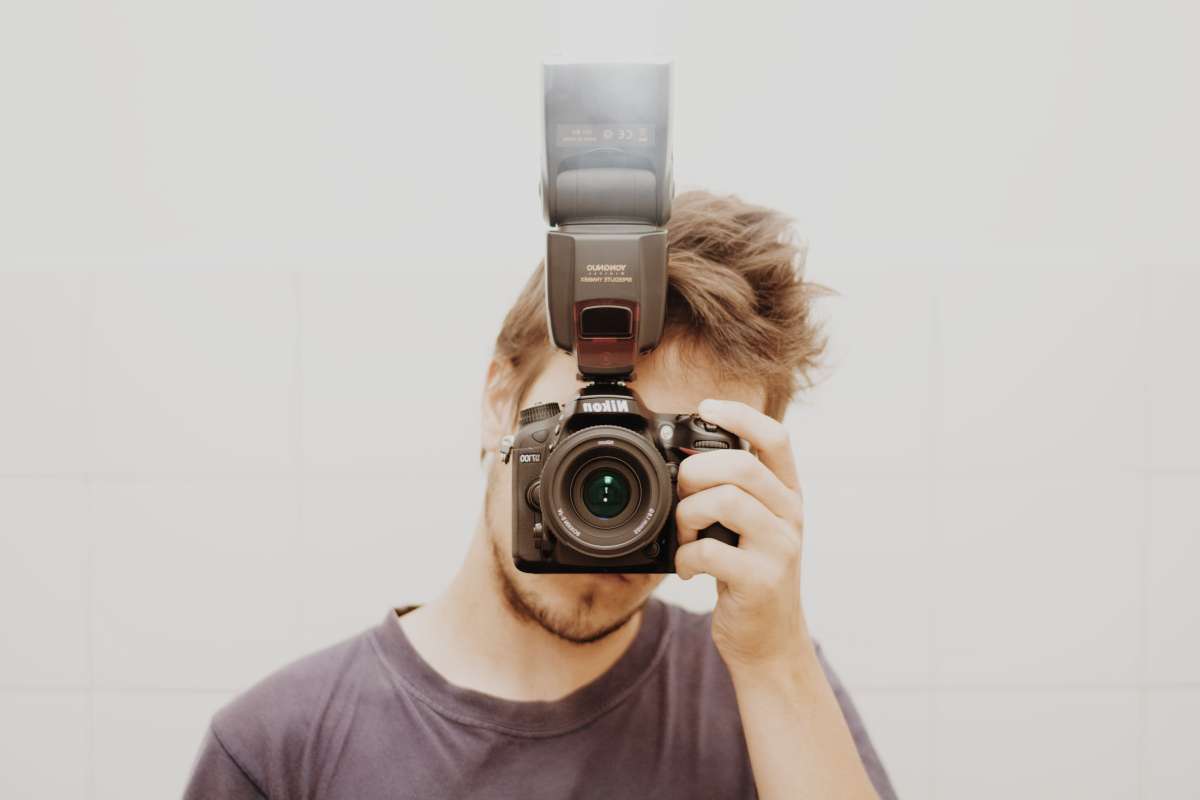
By connecting an external flash unit to your camera's hot shoe, you can take use of a technique called "bounce flash photography" to get bright, well-lit images of your subject.
Whether you want to illuminate the ceiling or the wall, the Speedlite can be angled in any direction. When you turn on your Speedlite, the light will bounce off of various surfaces and become diffused and softer.
Using a bounce flash is a great way to improve your interior photography. Read on to learn the ins and outs of photographing people and objects with hot shoe-mounted lights, such as Canon's Speedlites.
Basics of Bounce Flash Photography
Speedlite facing 90 degrees up, Speedlite facing 7 degrees down, Speedlite facing 90 degrees left, Speedlite facing 90 degrees right
For optimal results in bounce photography, the bounce angle must be just right. The flash head can be adjusted to different degrees of freedom on different Speedlite models. The aforementioned Speedlite 600EX II-flash RT's head may be adjusted to fire in any of four directions (up, down, left, or right). The angle at which the flash head is aimed determines how the subject is lit.
The AI (Auto Intelligent Bounce) functionality built into the Speedlite 470EX-AI calculates and presets the ideal bounce angle for realistic photos.
It takes time and experience to master the use of a Speedlite. To adjust the bounce's angle, turn the Speedlite's head. You can also drastically alter the final result by adjusting the angle at which you shoot with your Speedlite.
A softer light can be achieved by directing the flash head upwards or perpendicular to a wall or ceiling, which is ideal for indoor use. When photographing people, this minimizes reflections off of their skin, hair, and clothing.
Check out our extensive list of Wedding Photographers in Melbourne to help capture your special moments.
Tip 1: Shift the light source's angle to modify the shadows' appearance.
It can be bounced in two different ways:
- When shooting a scene, turn the flash's head such that it is pointing at the ceiling (also known as "ceil
- When the beat is angled perpendicular to a wall, it is called a "wall bounce."
The key difference between the two is in the way shades are cast. The light comes from above when it bounces off the ceiling. The outcome is the formation of clouds beneath the problem, which gives the impression that it is flat. When using a wall bounce, however, light enters the subject just from one side, casting shadows only on that side. This technique will help your topic seem more three-dimensional.
Tip 2: Pay Attention to the Background Color When Reflecting Light
For the best results, use a white background while taking photos with a bounce light.
The colour of the reflecting surface will become infused into your subject matter. Due to light refraction off the brown door, the true colour of the subject was lost in the prior case.
Tip 3: It's recommended that you keep a distance of 1 to 2 metres from the walls and ceilings.
One to two metres away from the wall or ceiling is appropriate for positioning the Speedlite. The effectiveness of a bounce diminishes rapidly once the separation between the source and the bounce surface is more than two metres. To put it another way, the resulting image will be dark.
Tip 4: Use a Bounce Adapter to Create Delicate Light
The "bounce adapter" is one such device, and it serves to scatter light. When attached to the flash's head, it significantly spreads the flash's soft light, making for more even lighting of the object during bounce photography. It is also possible to soften or eliminate the surrounding shadows. Bounce adapters come standard with the Speedlite 600EX II-RT and the Speedlite 430EX III-RT, and additional adapters can be purchased separately. It is incompatible with the Speedlite 270EX II, though.
Strong shadows can be formed rapidly when the distance between both the flash head and the bounce surface is tiny, which is why bounce adapters are so useful. The use of an adapter improves the realism of the subject's shadows and skin tone.
Tip 5: Use the Catchlight Panel to give your subject's eyes more depth and sparkle.
The catchlight panel may be stowed away in the flash head until it's needed; to use it, simply bring it out through the front of the device. When taking portraits, the panel helps to focus the camera's rays on the subject's eyes. Unlike the Speedlite 600EX II-RT and the Speedlite 430EX III-RT, the Speedlite 270EX II does not come with a built-in battery.
When employing bounce photography, it can be challenging to get a good catchlight in the subject's eyes because the flash is typically placed upwards or at an angle. A catchlight panel is what you require. Because the board tends to reflect light towards the eyes, it might make your subject look more alert in photos where facial emotions play a significant role, such as close-ups or chest shots. The light produced by the flash may change if you tilt the head to the left or right.
Working With Flash – How to Use Bounce Flash for Better Photos
Here we'll discuss some techniques for optimizing your camera's flash output when it's attached to the camera's hot shoe. Particularly, we'll examine flash bouncing in greater detail and see how it might be used to better effect.
If you're just getting started with flash, you've probably already bought your first flash. Congratulations! You're about to expand your toolkit by learning a new technique that will allow you to take stunning photos in any environment.
Have no fear if you haven't yet gone out and bought a flash. After reading this article, you should have a better idea of how to limit down your options.
Some myths concerning light's relative importance of size and distance are just that: myths. Since you're reading this, I'll assume that you're interested in learning how to photograph humans.
How harsh or soft the light is in an image depends on the size of the light source in comparison to the subject (i.e. the quality of light). Light will be somewhat harsh and generally less flattering if the light source is small in relation to your subject. Shadows cast by a tiny light source are more intricate because of the source's greater tendency toward specularity.
On the other hand, the larger the light source about your topic, the softer it will be, which will result in more appealing lighting.
Consider the sun for a second.
The sun, albeit a huge ball of fire in the sky, is actually quite tiny when compared to the size of a human because of the vast distance between the earth and the sun.
Going outside at midday during the summer will result in incredibly intense sunlight, casting deep shadows on your subject. Morning light is softer and more attractive when clouds are present because the size of the light source is increased (from the sun to the sky).
When you examine the front of most flashes, you will observe that the flash head does not have a particularly huge surface area, typically covering an area little bigger than a human head (compared to head size). Any photographer who has used a point-and-shoot camera or a digital single-lens reflex camera with a built-in or pop-up flash will attest to the fact that the resulting image is rarely something to write home about.
Both of them are direct light sources, and both produce very harsh, unattractive light.
Now let's step it up a notch and use an external flash that plugs into your camera's hot shoe; the area it illuminates is greater, but it's still tiny next to a human being. When using an external flash, the resulting illumination will still fall short of expectations.
Look at this sample shot that was taken with the subject illuminated by the camera's built-in flash.
Take note of the severe shadow on the wall behind the subject and the specular highlights on the subject's forehead that result from utilizing direct, on-camera flash.
Is there anything you can do to get better shots while only using one camera flash?
Bounce the Flash
Learning how to "bounce" your flash, like Tigger in Winnie the Pooh, is the first step in producing more pleasing light when using a single flash on-camera.
If you're simply going to buy one flash to begin with, you should consider the restrictions of some of the products on the market before you start thinking about bouncing your flash.
If you're only looking at prices while deciding between Canon Speedlites, the two entry-level models may seem like a good option. However, they all share a similar flaw that makes them subpar options for improving the quality of your flash photographs. These inexpensive flashes have fixed flash heads, so you can't aim the flash in a different direction or bounce it off a wall.
Both the Speedlite 90EX and the Speedlite 270EX from Canon's current line-up fit this description. You may use off-camera flashes and numerous speedlites with these flashes because of their wireless capability. Even so, if you're only intending to buy one second initially, these aren't the ideal option for you.
In order to bounce light off of another surface, you should search for a flash that has a head that can be swivelled or tilted. Here are some choices (many excellent non-OEM brands are available at reduced costs; do your research to get the best one for you).
Benefits of Bouncing Your Flash
There are two ways in which bouncing the flash will immediately enhance the quality of the light:
- Increase the relative size of the light source (making it softer)
- Change the direction of the morning, which in turn changes the direction of the shadows
A modest light source (your camera's flash) can be transformed into a more substantial and slightly softer light source by reflecting it off a larger surface (such as a wall or ceiling).
Considerations When Bouncing Your Flash
There are a few factors to take into account when bouncing the flash:
The Direction of the Flash
The primary factor is going to be the flash's directional bias.
Light refraction is analogous to the game of pool (billiard). The direction from which the light hits your subject depends on the angles you choose. You can often tilt the flash head up and down and rotate it through 180 degrees on most speedlights.
As a result, you can direct the flash upwards and reflect its light off a surface, such as a ceiling. If you bounce your flash from the ceiling, you risk casting shadows under your eyebrows, on your nose, and on your chin.
Colour of the Bounce Surface
The colour of the surface is the second factor to think about while bouncing flash.
Your best bet is to try reflecting the flash off of something white or neutral coloured. If you don't neutralise the bias, your subject will take on an unnatural hue. A piece of white foam core, a reflector, or an umbrella mounted on a light stand can be used to redirect the flash if you don't have access to a neutral subject.
Get a helper (or find someone to help you) to hold the reflector where you wish to bounce the flash.
Conclusion
Bounce flash is a technique that uses an object to reflect the camera's flash back onto the subject. The result is ambient light with depth and texture that mimics the effect of using an off-camera flash. Inapplicable to digital cameras because of their built-in pop-up flashes. Bounce flash is ideal for producing beautiful soft light, but it will significantly reduce the emotional effect of your momentous occasion. It is often possible to position the subject such that they are illuminated from a more pleasing angle by just shifting their position.
The closer the light or subject is, the less energy will be lost in the bounce of the flash. Photographers can use reflectors to either refocus ambient light or to reflect artificial light back into their compositions. The amount of natural light captured in a flash photograph is controlled by the camera's shutter speed. Some instant cameras have a bounce card attached to the back, with the flash pointed upward, to avoid catching the subject's eye. Canon's Speedlite 600EX II-flash RT's head may be adjusted to fire in any of four directions (up, down, left, or right).
The angle at which the flash head is aimed determines how the subject is lit. The AI (Auto Intelligent Bounce) functionality built into the Speedlite 470EX-AI calculates and presets the ideal bounce angle for realistic photos. Use a white background for the best results when using a bounce light, and keep a distance of 1 to 2 metres from walls and ceilings. Use a bounce adapter to scatter light, which significantly spreads the flash's soft light. The catchlight panel can be stowed away in the flash head until it's needed; to use it, simply bring it out through the front of the device.
How harsh or soft the light is in an image depends on the size of the light source in comparison to the subject (i.e. the quality of light). A catchlight panel is what you require to get a good catchlight in your subject's eyes. Because the board tends to reflect light towards the eyes, it might make your subject look more alert in photos where facial emotions play a significant role, like close-ups or chest shots. Photographic equipment with a built-in or pop-up flash produces harsh, unattractive light. Learning how to "bounce" your flash, like Tigger in Winnie the Pooh, is the first step in producing more pleasing light.
You may use off-camera flashes and numerous speedlites with these flashes because of their wireless capability. If you're only intending to buy one flash, you should consider the restrictions of some of the products on the market. If you're looking for a flash that can be bounced off of another surface, you should search for one that has a head that is swivelled or tilted. A modest light source can be transformed into a more substantial and slightly softer light source by reflecting it off a larger surface (such as a wall or ceiling).
Content Summary:
- And setting up an off-camera flash can be time-consuming and costly.
- However, with bounce flash, you may mimic the off-camera look without having to move the flash itself.
- Bounce flash is a technique that uses an object to reflect the camera's flash back onto the subject.
- The result is ambient light with depth and texture that mimics the effect of using an off-camera flash.
- To get the most out of your flash, especially when you're just starting out, you should learn the fundamentals of bounce flash first.
- Whether you're a beginning wedding photographer taking photos at receptions or a portrait photographer just starting out, here are some techniques for using bounce flash effectively.
- Looking for the best Wedding Photographer in Melbourne?
- Bounce flashes consist of a flash with a movable head that slides into the camera's hot shoe.
- When shooting a photograph, one technique is to bounce light off the subject at a 45- or 90-degree angle from the side.
- A good bounce surface, however, requires more than just a large area.
- The topic will be tinged with the colour of the bouncing surface.
- If the final photograph is too dark after bouncing the light, either the flash or the subject needs to be moved closer to the surface being bounced off of.
- The closer the light or subject is, the less energy will be lost in the bounce of the flash.
- Use a flash that you can adjust manually.
- In most cases, bounce flash calls for more adaptable camera settings than either off-camera or on-camera manual flash photography.
- You can always start with 1/4 if you don't know where else to begin.
- The floor may not be optimal for bouncing in some circumstances.
- Put your flash's light into a big reflector and see if it helps.
- An advantage of using a reflector over reflecting the flash off a wall is that you can focus the light exactly where you need it.
- As a result, mounting it to a ceiling or wall is often the most practical option.
- If you Need diffuse lighting in any setting, a Bounce Card is your best bet.
- With the bounce flash method, any glossy surface will do in place of a reflector.
- Using a flash bounce card, you can redirect some of the light from your flash back into the camera.
- Some seconds have a bounce card already built in.
- The amount of natural light captured in a flash photograph is controlled by the camera's shutter speed.
- To solve this problem, changing the shutter speed is the only option.
- If there isn't enough light, slow the shutter speed.
- By connecting an external flash unit to your camera's hot shoe, you can take use of a technique called "bounce flash photography" to get bright, well-lit images of your subject.
- Using a bounce flash is a great way to improve your interior photography.
- Read on to learn the ins and outs of photographing people and objects with hot shoe-mounted lights, such as Canon's Speedlites.
- It takes time and experience to master the use of a Speedlite.
- To adjust the bounce's angle, turn the Speedlite's head.
- You can also drastically alter the final result by adjusting the angle at which you shoot with your Speedlite.
- When the beat is angled perpendicular to a wall, it is called a "wall bounce."
- When using a wall bounce, however, light enters the subject just from one side, casting shadows only on that side.
- The colour of the reflecting surface will become infused into your subject matter.
- One to two metres away from the wall or ceiling is appropriate for positioning the Speedlite.
- The use of an adapter improves the realism of the subject's shadows and skin tone.
- Unlike the Speedlite 600EX II-RT and the Speedlite 430EX III-RT, the Speedlite 270EX II does not come with a built-in battery.
- When employing bounce photography, it can be challenging to get a good catchlight in the subject's eyes because the flash is typically placed upwards or at an angle.
- A catchlight panel is what you require.
- Particularly, we'll examine flash bouncing in greater detail and see how it might be used to better effect.
- Some myths concerning light's relative importance of size and distance are just that: myths.
- How harsh or soft the light is in an image depends on the size of the light source in comparison to the subject (i.e. the quality of light).
- Morning light is softer and more attractive when clouds are present because the size of the light source is increased (from the sun to the sky).
- Both of them are direct light sources, and both produce very harsh, unattractive light.
- When using an external flash, the resulting illumination will still fall short of expectations.
- Look at this sample shot that was taken with the subject illuminated by the camera's built-in flash.
- Is there anything you can do to get better shots while only using one camera flash?
- Learning how to "bounce" your flash, like Tigger in Winnie the Pooh, is the first step in producing more pleasing light when using a single flash on-camera.
- If you're simply going to buy one flash to begin with, you should consider the restrictions of some of the products on the market before you start thinking about bouncing your flash.
- Both the Speedlite 90EX and the Speedlite 270EX from Canon's current line-up fit this description.
- In order to bounce light off of another surface, you should search for a flash that has a head that can be swivelled or tilted.
- The direction from which the light hits your subject depends on the angles you choose.
- You can often tilt the flash head up and down and rotate it through 180 degrees on most speedlights.
- As a result, you can direct the flash upwards and reflect its light off a surface, such as a ceiling.
- The colour of the surface is the second factor to think about while bouncing flash.
- Your best bet is to try reflecting the flash off of something white or neutral coloured.
- Get a helper (or find someone to help you) to hold the reflector where you wish to bounce the flash.
FAQs About Bounce Flash
The secret is, bouncing flash at a 45 degree angle. When we tilt our flash to the side at a 45 degree angle, we are bouncing the light off the side walls and right to the subjects we are photographing
Enter bounce flash, which allows you to create soft, flattering light and an angled lighting effect while using a single flash mounted to your camera. Instead of pointing the flash directly at your subject and firing away, you simply angle it upward or to the side, let the light bounce off the wall, and – voila!
The most common way to employ a bounce is simply to place it opposite to your primary light source and outside the camera's field of view. In this shot, for example, the light is coming in from the right side, through a window.
If you're shooting outdoor photography with flash and have nothing else to bounce light off of, just use the bounce card to deflect the light coming from the flash. When the setup involves positioning two speedlights opposite each other in a location, point the flash head upwards and pull out the diffuser.
All you should have to do at this point is aim your flash in the direction you would like to bounce the light from. This will take a little bit of practice and you'll have to be conscious of what you're bouncing off of. We typically position the flash at about 45 degrees and point it over our left or right shoulder.